Procedure
- To add the contact form to a separate page you first have to add it in layout (Sidebar) of your blog but we will later remove it from sidebar.So first you have to add it the blogger so our previous article on Adding Blogger Official Contact Form To Blogger Will Help You Out.
- Now After Adding contact form in layout now head over to pages and 'Create a Blank Page'
- Now Go to HTML Section of The pages & Also Select Some of The option in The Image Below:
- After That Paste The Following Code in The HTML Section of Your Page:
<form name='contact-form'> <div>Your Name : </div> <input class='contact-form-name' id='ContactForm1_contact-form-name' name='name' size='30' type='text' value=''/> <div>Your Email: <em>(required)</em></div> <input class='contact-form-email' id='ContactForm1_contact-form-email' name='email' size='30' type='text' value=''/> <div>Your Message: <em>(required)</em></div> <textarea class='contact-form-email-message' id='ContactForm1_contact-form-email-message' name='email-message' rows='5'></textarea> <p></p> <input class='contact-form-button contact-form-button-submit' id='ContactForm1_contact-form-submit' type='button' value='Send'/> <div style='text-align: center; max-width: 450px; width: 100%'> <p class='contact-form-error-message' id='ContactForm1_contact-form-error-message'></p> <p class='contact-form-success-message' id='ContactForm1_contact-form-success-message'></p> </div> </form>
- Now After That Go to 'Template' & Click on Edit HTML & and Jump to the ContactForm Code and expand the widget code
- and then expand the main b:includable
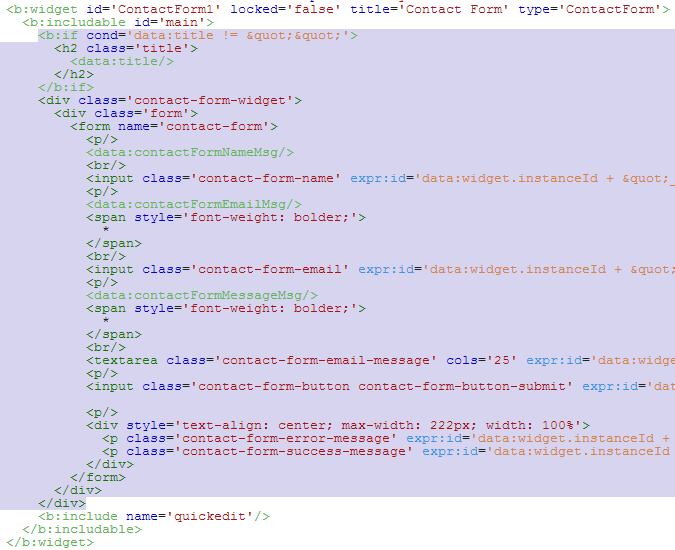
- Now Delete The Following Highlighted Code
- So it Will End Up Like This
- Now You have successfully hide the contact form from appearing on your sidebar of you blog but make sure that you don't delete the contact form widget from the layout.
- Save it & Happy Separate Contact Page :)
Conclusion
Now You have Added the contact form on a separate page and it will also leave a good impression on your blog readers please share if you like the article


No comments:
Post a Comment