 Giving a mature and skilled look to your "About Us" webpage ought to be amongst your initial priorities. visitors have the correct to know who you're and what you are doing and wherever you belong. Your about us page is your Identity page wherever you add somewhat bio of your self then make a case for the aim of your blog or web site. it is the most significant page for each your regular visitors and advertisers. thus make certain you leave an honest impression on them by presenting your self well. simply an hour past I styled my personal "About Me" Page and i hope the tutorial nowadays can make sense once you see this new proposed design.
FEATURES
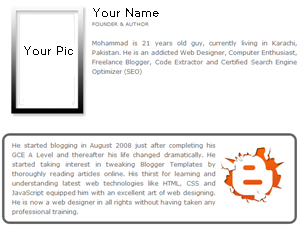
The Design includes four most significant options that are:
- All Blogger Widgets below Post titles and at the bottom are kept hidden.
- Three stunning Rows Describe your Entire conception of web site i.e 1- Your Bio, 2- web log Purpose and 3- concluding paragraph.
- Passive Voice Speech is employed to form things look skilled.
- It loads in Seconds.
How To Create The 'About us' Page
- First Copy Everything from your current 'about us' page
- then write a fresh 2-3 lines about you concluding your skills,hometown,and what you do and add your image left to it for all this purpose you have to use the following code for about us page
<div style="border: #686868 5px solid; padding: 10px; -moz-border-radius: 15px; -webkit-border-radius: 15px">
<div style="text-align: justify"><img style="display: inline; float: right" align="right" src="ADD IMAGE LINK HERE" width="128" height="128" /></div>
<div style="text-align: justify"><font color="#666666">
ADD PARAGRAPH TEXT HERE</font></div>
</div>
<div style="text-align: justify"> </div>
If you have only 1 paragraph use above code but for multi paragraphs use the code as following:
<div style="border: #686868 5px solid; padding: 10px; -moz-border-radius: 15px; -webkit-border-radius: 15px">
<div style="text-align: justify"><img style="display: inline; float: right" align="right" src="ADD IMAGE LINK HERE" width="128" height="128" /></div>
<div style="text-align: justify"><font color="#666666">
ADD PARAGRAPH-1 TEXT HERE</font></div>
</div>
<div style="text-align: justify"> </div>
<div style="border: #686868 5px solid; padding: 10px; -moz-border-radius: 15px; -webkit-border-radius: 15px">
<div style="text-align: justify"><img style="display: inline; float: right" align="right" src="ADD IMAGE LINK HERE" width="128" height="128" /></div>
<div style="text-align: justify"><font color="#666666">
ADD PARAGRAPH-2 TEXT HERE</font></div>
</div>
<div style="text-align: justify"> </div>
<div style="border: #686868 5px solid; padding: 10px; -moz-border-radius: 15px; -webkit-border-radius: 15px">
<div style="text-align: justify"><img style="display: inline; float: right" align="right" src="ADD IMAGE LINK HERE" width="128" height="128" /></div>
<div style="text-align: justify"><font color="#666666">
ADD PARAGRAPH-3 TEXT HERE</font></div>
</div>
<div style="text-align: justify"> </div>
Editings in Code
- Replace ADD IMAGE LINK with your image link
- Also Replace ADD PARAGRAPH TEXT HERE With your own paragraph
- If you Want To change border colour and height change the highlighted values
- Now After Putting All Links & Text in the Code Copy The Whole Code and make a new page
- In the New page Select HTML & paste the Code there and you'r all done
Hide The Widgets
Now your code is done its time to attack the widgets which are your gadgets or Adsense codes to remove them use the following trick.
- Goto Blogger
- Click on Template in The left Bar
- Now Click EDIT HTML There
- Search For The Following Code
<data:post.body/>
- and just above it enclose all your widget codes between the code below
<b:if cond='data:blog.url != "ADD YOUR ABOUT US PAGE URL HERE"'>WIDGET CODES
</b:if>
- Replace ADD YOUR ABOUT US PAGE URL HERE with your About Us Page link
- Do the same for all the widget codes below <data:post.body>
- And Finally Save The Template and Enjoy !
Conclusion
Now you have a professional looking 'About Us' Page that will interact your visitors and leave a good impression on them if you have any problems in this whole tutorial feel free to ask in comments because we are here all time for your help. Good Luck!
No comments:
Post a Comment